I started out as a traditional artist, and to this day I’m still converting some of my original artwork to digital. I feel like I’ve got the process nailed down pretty good at this point, so teaching you how to digitize artwork should be relatively straightforward.
The entire process is extremely simple actually. It’s more than likely that you’ve already got everything you need to get started. How is that even possible? Well, based on my experience of digitizing my own artwork over the years, there are two completely valid ways of going about it. Both are extremely simple:
- Take digital photos
- Use a high-quality scanner
There are certainly advantages and disadvantages to using each. The method that’s right for you will ultimately depend on the type of artwork you do.
Please Note:
Some of the links on this page are affiliate links. I (Scott / norebbo.com) am a participant in the Amazon Services LLC Associates Program, an affiliate advertising program designed to provide a means for sites to earn advertising fees by advertising and linking to Amazon.com.
How to digitize artwork by taking digital photos
Back when I first started digitizing my artwork back in 1996, the only way to do it was with clunky film cameras and extremely simple software on very weak computers. A lot has changed since then (thankfully), and this is the process for doing it today:
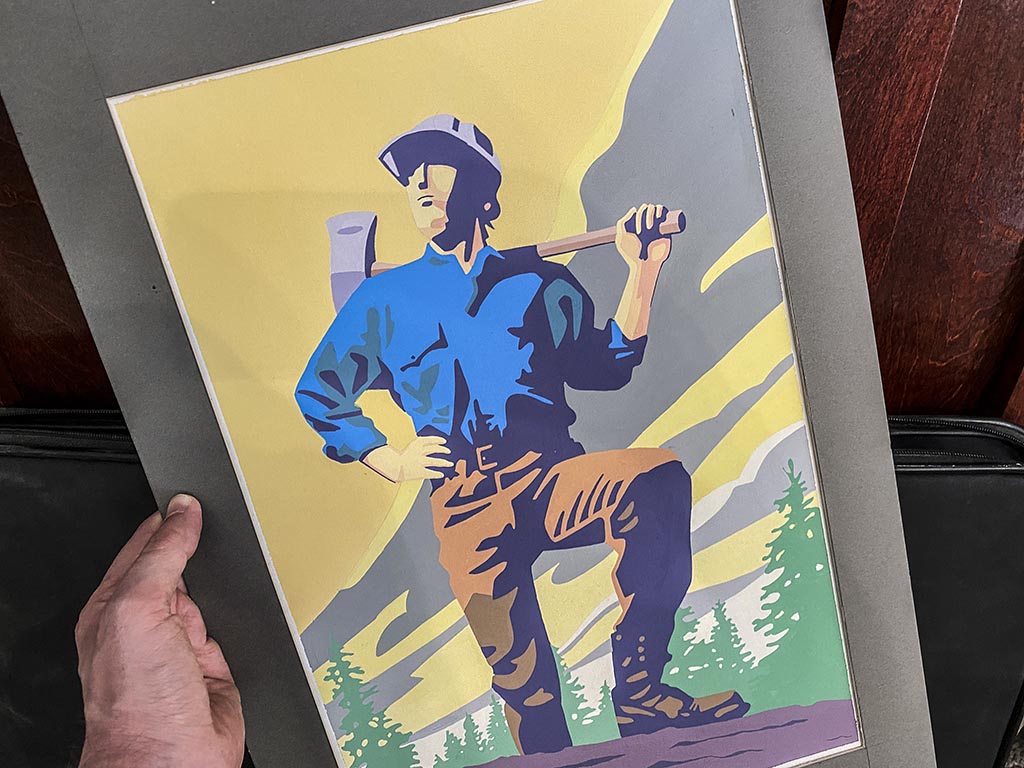
Option 1: take handheld photos with your phone
Unless you’re an absolute perfectionist, the phone you have in your pocket is more than capable of digitizing your artwork. Camera phones are absolutely incredible these days, and any phone built in the past 3 to 4 years very likely has a camera even better than a dedicated digital camera from just 10 years ago. Technology moves fast!
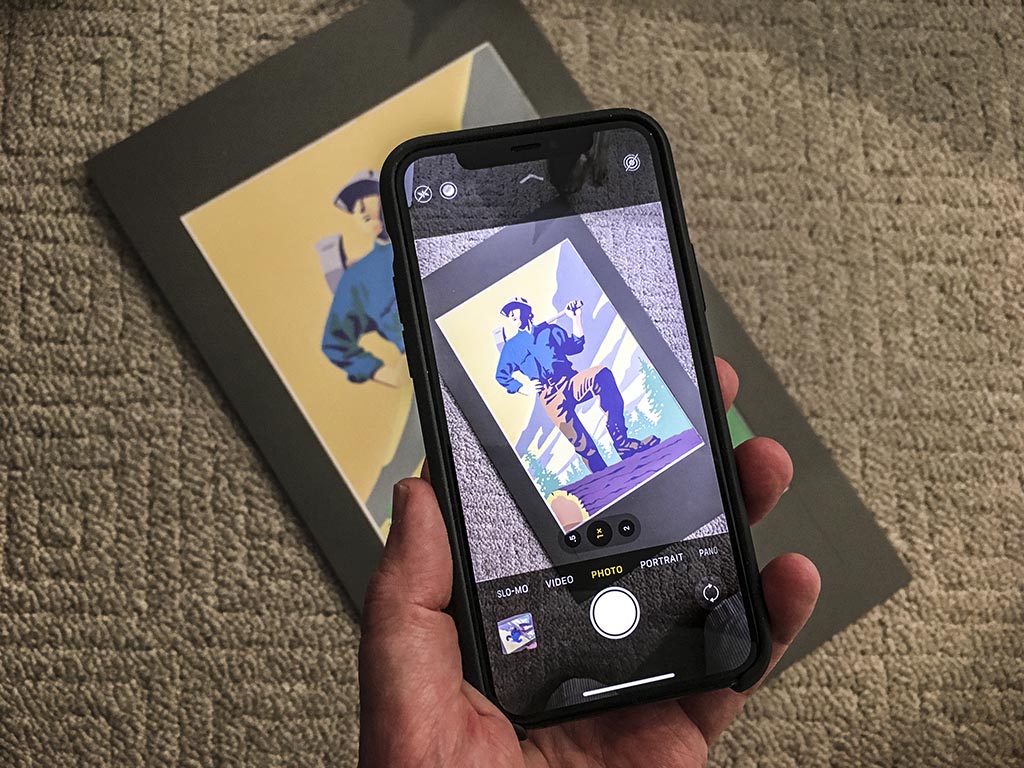
Tips for getting high-quality photos of your artwork using a smartphone:
- It’s all about the light! Natural sunlight is the best light you’re going to find, which is good news because it means that you don’t have to worry about purchasing and setting up a complicated lighting system.
- I like to shoot outside, usually mid morning or mid afternoon when the sun is bright but not at full intensity.
- Put down a neutral-color blanket in a large open area and lay your artwork face up on that. You can also hang it on a wall that has decent sunlight coverage if that makes it easier for your specific type of artwork.
- Since the sun is at a slight angle (and not directly overhead), you should be able to stand right in front of it without casting a shadow as you frame your shot.
- Try to stand back a little and give yourself room to crop and edit the photo later. Trust me. It’s going to be rare that you’ll get a perfect shot directly out of the camera, so you’re probably going to want to do some editing to get your artwork looking as good as possible.
- Another advantage of standing back a little further is that there will be less lens distortion in the photo. The further you stand back, the straighter your lines and edges will be. This is important!
Once I have a well-lit photo, I like to use the Adobe Camera Raw editor. This comes bundled with Adobe Photoshop, and it makes the process of doing quick edits (such as lens distortion removal, line straightening and color directions) very quick and easy.
One final thing to note about using your phone to digitize your artwork:
One of the main advantages is that you’ll be able to capture a larger area, which is ideal for large format art. As a matter fact, if all you do is paint on canvas larger than 36 inches wide, shooting with a phone it’s probably going to be your best option.
Option 2: Use a top-down photo mount
For those looking for more control (and better quality) than using just a phone, I highly recommend using a top-down photo mount system. Doing so will allow you to control the light and positioning of your artwork with more precision than you could by simply hand-holding your phone in front of your piece.
This is the process:
- Lay your artwork down on a flat table (face up).
- Position the camera mount directly above your artwork. I find that a distance of 30 inches is a good place to start, but you’ll probably have to experiment a bit depending on the size of your artwork and the focal length of the lens on your camera.
- Speaking of the lens, a 50mm lens is ideal since it won’t distort the edges. Both vertical and horizontal lines will be straight.
- I use a Canon 80D DSLR with a cheap (but very high-quality) 50mm lens for my setup.
- Position the lights on either side of the camera facing down on the artwork so that there’s even coverage.
- Don’t worry about the light temperature so much if you’re willing to spend time editing the photo later. If not, LED daylight bulbs are a very good option.
FYI, I use the Glide Gear OH 75 Overhead Camera Pole Mount System. I like it because it’s not a permanent structure and you can fold it down and store it away when not needed. If you’re serious about digitizing your paintings and other artwork, this is definitely the best way to do it!
Digitizing artwork with a flatbed scanner
Flatbed scanners has come along way over the years, and it’s a device you’re going to need if you’re looking for a quick and simple way to digitize smaller art pieces.
The catch, of course, is that last sentence. Scanning any artwork larger than 24 inches wide is going to be extremely cumbersome on a flatbed scanner, so this is basically only an option for those doing small scale artwork. Let’s take a look at some of the best options currently on the market:
My favorite flatbed scanner for scanning art
I’m a big fan of the Epson Perfection V600. It’s an extremely feature-rich scanner for the price, and it has all the features that artist need to get high-quality scans of their artwork. It’ll also scan photos and slides, which makes it even more of a versatile choice.
The bundled software that comes with it is fairly decent, though it’s not required if you’re using Photoshop or any other decent graphics editing program. Most of today’s graphics editing software packages have really good importing features that will control this scanner directly.
Those of you seeking the highest quality from a flatbed scanner should probably have a look at the Epson Perfection V850 Pro Scanner. It’s essentially a professional-grade photo scanner with extremely accurate color profiles (and ultra-high resolution).
A few words about scanning large format artwork
Large-format scanners do you exist, and most of them will do the job magnificently, but there are a few things you need to know:
- Large format scanners don’t have the ability to scan canvased artwork. In other words, the input mechanism only allows for thin and flexible materials such as paper or unframed canvas. So – this isn’t going to work if you’re not willing to remove the frame from your paintings.
- Large format scanners are expensive. Basically, it will be hard to justify unless you’re a professional artist doing this full-time as a business.
If I needed to digitize large-format artwork, I would probably choose the Colortrac SmartLF 36″ scanner.
It’s perfect for artists who create on flexible (and relatively thin) media. While it may not make much sense for oil and acrylic artists who paint on framed canvases, it may be ideal for large-format watercolorists.
My best tips for digitizing artwork
I’ve learned a few things from digitizing my artwork for over a span of 30 years:
- Anything over 300 dpi is overkill for most uses. The only time you’ll ever need to go higher than that is if you plan on printing your artwork larger than actual size.
- Always make sure to save your digitized artwork in a non-lossy format such as TIFF, PSD, or PNG. Use that file as your main backup, and then copy it whenever you want to make a smaller version suitable for posting on social media or on a website somewhere.
- Digitize your artwork as soon as you create it! I realize this sounds like an odd tip, but believe me. I’m still scanning all the artwork that I created back in the mid 90s, and to be honest I’m beyond sick and tired of it. If I would’ve had the foresight to scan my artwork as soon as I created it, I wouldn’t have this mind-numbing chore on my to do list.

Appreciate your detailed article. I have myriad old Kodachrome slides, is there a scanner you would suggest for handling them?
Glad you found this useful Ann! A friend of mine has been using the Kodak Slide N Scan to digitize his old aviation photography collection (shot on Kodachrome). The results are fantastic.
Hi,
I appreciate your article. I wonder if you could help answer a question for me? And I thank you so much in advance for taking the time to read this, and respond if you can. I appreciate it. I had a 20 year career as a fine artist back in the 1980’s and 1990’s, and have oil paintings on canvas that I did many years ago. I have photos that I took of them to use for professional purposes. The photos were taken with an old style 35mm film camera. The problem is that these photos aren’t digital. I’d like to try and sell my work through Print on Demand companies, perhaps like Redbubble. But for any company to make prints of them of any size that anyone would want, it looks like I’d have to digitize them. I’m not in a position to retake photos of the paintings with my cell phone camera. I don’t have the natural light anymore in the place that I now live in. The photos are very high quality, but small at 3 and a half” x 5.” Do you know if it would work to get those photos digitized. The original oils are mostly 24″ x 30″ in size. I found a place that says they scan photos for people to digitize them. But I’m not sure if that would give a workable print for use in fine art reproduction. I have a page on the Fine Art America website, and when I uploaded my regular film photos to my page, a message came up saying that (in one case) “this image is 851 pixels by 634 pixels, and that this allows you to sell prints at these sizes: 8″ x 5.8,” or 10″ x 7.5.” The other images were similar small sizes. I need higher resolution and pixel photos to use for this.
While I’m not a working artist anymore, and am working on a different career in another field, I would like to find a way to monetize all these older oil paintings that are stacked up in the house. I’m trying to sell them. I also can’t scan the original paintings as they are all framed. I’m not set up to do that here, either. I want to be able to offer high quality larger prints of my oils on canvas.
I’d be grateful if you could tell me if this would work or not to digitize a photo that isn’t digital, and then use that digitized photo to make reproduction prints of the original painting. Mostly I’ve heard that the photo should be taken digitally from the original painting the first time out, but I can’t do that now anymore.
Sincerely,
Sharon Arthur
Hi Arthur – good question. I did a lot of acrylic painting in my younger years, and it was somewhat of a pain to get it all digitized. Long story short:
You’re not going to get a good (printable) digital file by scanning a 5×3.5 35mm print. You’ll need to scan the negatives if your goal is high resolution printing. Negative film scanners are quite good these days.
If you don’t have the negatives anymore, you’re left with two choices:
1). Scan the original artwork. I know you said that this wasn’t something you wanted to do, but this is the only way to get the best quality reproduction possible.
Or…
2). Take a high-resolution digital photo of the original artwork in a well/evenly lit space. Don’t worry about getting some of the frame in the shot. You can edit/crop that out in any decent photo editing software.
Good luck!